An anonymous poster on my fifth post about Single Page Applications (SPA) asked if it was possible to deploy SPAs on Windows Azure. As it turns out the Windows Azure Web Site offering makes this very easy to do if you build your SPA as outlined in that post.
Windows Azure Websites
Windows Azure Web Sites have been recently announced by Microsoft and are at the time of writing released as a preview feature on Windows Azure.
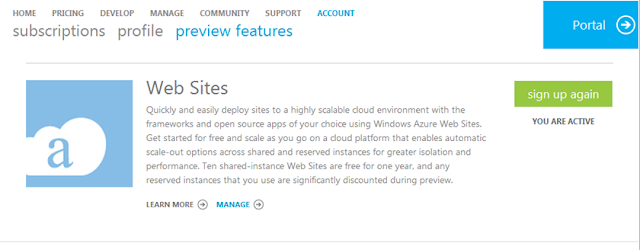
If you don't have a Windows Azure account already you can sign up for the free 90-day trial. Since the feature is still in preview, you can sign up for free as well on your Windows Azure Account Page. Activation can take a full day.
 |
| Windows Azure Account - Preview Features |
Once you have received the e-mail message that your account has been activated, you can navigate to the brand new Windows Azure Portal and create a new website. Since I will be deploying my 'DeliveryTracker' Single Page Application, I will also need to create a database.
 |
| New - Web Site - Create With Database |
Follow the wizard that appears. If you don't have a SQL Database in Azure already allow the wizard to create one for you.
SQL Databases in Windows Azure
SQL databases are part of the Data Management offering of Windows Azure. You can either manage these databases from the portal or via the SQL Server Management Studio (SSMS). Because I already had an existing SQL database in Azure, I chose to migrate my data from my local SQL Server using SSMS.
 |
| Deploy Database to SQL Azure |
If your firewall allows it (port 1433 needs to be open) you can deploy to SQL Azure directly. If not, you can choose to 'Export the Data-tier application'. This generates a .bacpac file that you can import in the management window of your SQL Azure.
In any case you need to make sure that the firewall of the SQL Azure server accepts the ip address of your local machine to connect. This you can also manage from the SQL Azure portal
In any case you need to make sure that the firewall of the SQL Azure server accepts the ip address of your local machine to connect. This you can also manage from the SQL Azure portal
Deploying DeliveryTracker
Now that everything is in place, the actual deployment is quite simple:
- Download the DeliveryTracker application, unzip it and open it with Visual Studio 2010.
- Open the web.config file and rename the 'DefaultConnection' to 'AppDbContext' which is the name of the actual Entity Framework Code First DbContext that is used.
- Right-click the DeliveryTracker project and choose 'Publish...'. A wizard opens.
- In the first screen ('Profile') of the wizard you can import a publishing profile. This publishing profile is available for download in the management console for your new website in the Azure portal
- In the third screen ('Settings') of the wizard, make sure that the connection string is called 'AppDbContext' and is pointing to the correct database that was created above in SQL Azure.
- Click Publish
Visual Studio will now start deploying the website to Windows Azure. It doesn't take too long to finish. You can visit the DeliveryTracker site that I deployed while writing this post.
I probably should add a 'Reset Test Data' button somewhere :)