Getting VibeVoice Running on a Windows Machine with RTX 3060 Ti
VibeVoice is a powerful text-to-speech (TTS) model developed by Microsoft. Unfortunately, the official GitHub repository has been closed, so the only way to get started is via community builds hosted on Hugging Face.
Demo
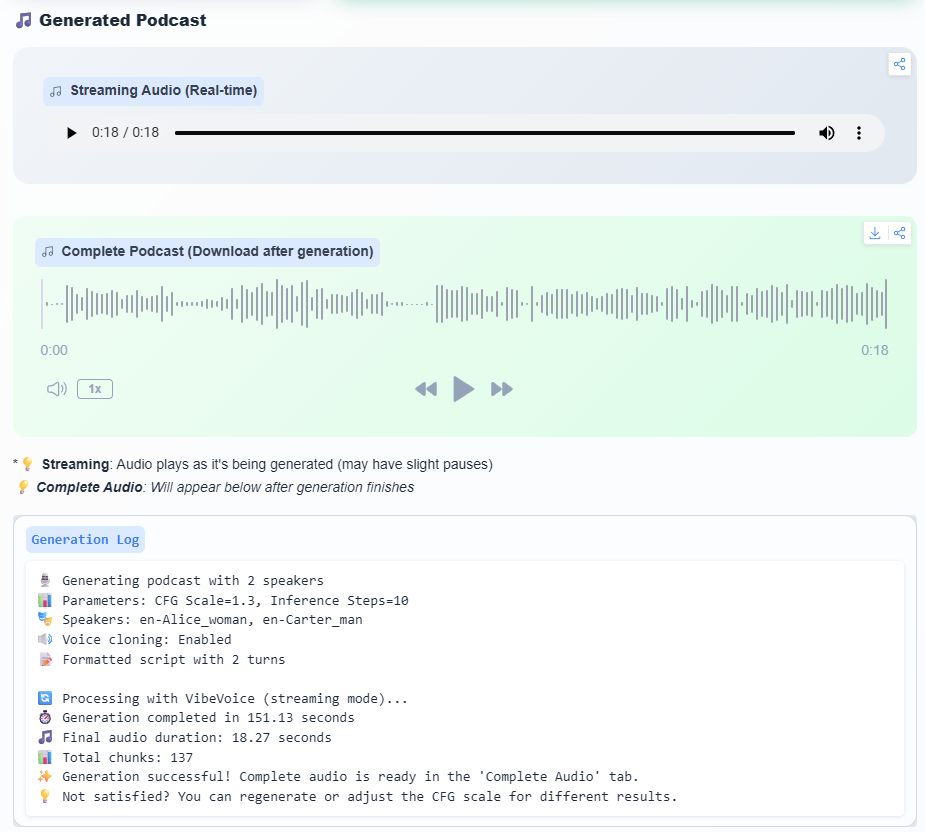
You can test it on VibeVoice.io, which is very fast, or on HuggingFace, which is significantly slower. In our test, VibeVoice produced 18 seconds of audio in only 14.5 seconds, compared to 151 seconds on the HuggingFace platform.

In this post, I’ll walk through my journey setting up VibeVoice on Windows, from the initial 1.5B model to the full 7B model, and finally using quantized 4-bit models that actually fit on my 8GB GPU.
Make sure you have a working Python environment, preferably Python 3.11 or similar, and a virtual environment to keep things clean.
Installing VibeVoice from a Community Build
Since Microsoft’s original repository is no longer available, I started with the VibeVoice-Community repository on Github:
git clone https://github.com/vibevoice-community/VibeVoice.git
cd VibeVoice
pip install -e .
This installed the basic dependencies.
First Attempts: 1.5B Model
I first tried the 1.5B model, which is smaller and more manageable:
python demo/gradio_demo.py --model_path vibevoice/VibeVoice-1.5B --device cuda --share
✅ Result: Everything worked fine. The model fit comfortably on my GPU, and inference speed was reasonable.
This gave me confidence to try the full 7B model.
The 7B Model: Too Big for 8GB VRAM
I moved on to the 7B model:
python demo/gradio_demo.py --model_path vibevoice/VibeVoice-7B --device cuda --share
⚠️ Problem: The 7B FP16 checkpoint requires ~19GB VRAM, which is far beyond my RTX 3060 Ti’s 8GB.
Using Task Manager → Performance → GPU, I confirmed:
- Dedicated VRAM: ~7–8 GB
- Shared Memory: ~10–11 GB
❌ Result: It worked but ran extremely slowly. Clearly, running full precision 7B wasn’t feasible on my setup.
Using Quantized 4-bit Models
The solution is quantized models which reduce VRAM usage dramatically. The 8-bit version requires 12 GB of VRAM. The 4-bit version requires 8GB, which is ideal for my RTX 3060 Ti.
Download 4-bit model locally
I downloaded the community 7B 4-bit model and placed it in a local folder D:\Huggingface\VibeVoice7b-low-vram\.
git clone https://huggingface.co/Dannidee/VibeVoice7b-low-vram D:\Huggingface\VibeVoice7b-low-vram
Install bitsandbytes
Since the model is 4-bit quantized, it requires the bitsandbytes library:
pip install bitsandbytes
Run the demo with the local 4-bit model
python demo/gradio_demo.py --model_path D:\Huggingface\VibeVoice7b-low-vram\4bit\ --share
Verify GPU Usage
Using Task Manager → Performance → GPU, I confirmed:
- Dedicated VRAM: ~7–8 GB
- Shared Memory: 0 GB
✅ Result: The quantized 4-bit model finally fits on my 8GB GPU and runs at a usable speed.
Key Takeaways
Community builds are essential now that Microsoft closed the official repo.
- 1.5B models work fine for smaller setups, perfect for experimentation.
- Full 7B FP16 models are too big for 8GB GPUs — expect extreme slowdowns on older video cards
- 4-bit or 8-bit quantization +
bitsandbytesis the practical solution for running large models on consumer GPUs. - Always check VRAM usage in Task Manager to confirm the model fits.
VibeVoice is now running smoothly on my RTX 3060 Ti, and with quantized models, I can explore larger models without upgrading my hardware.